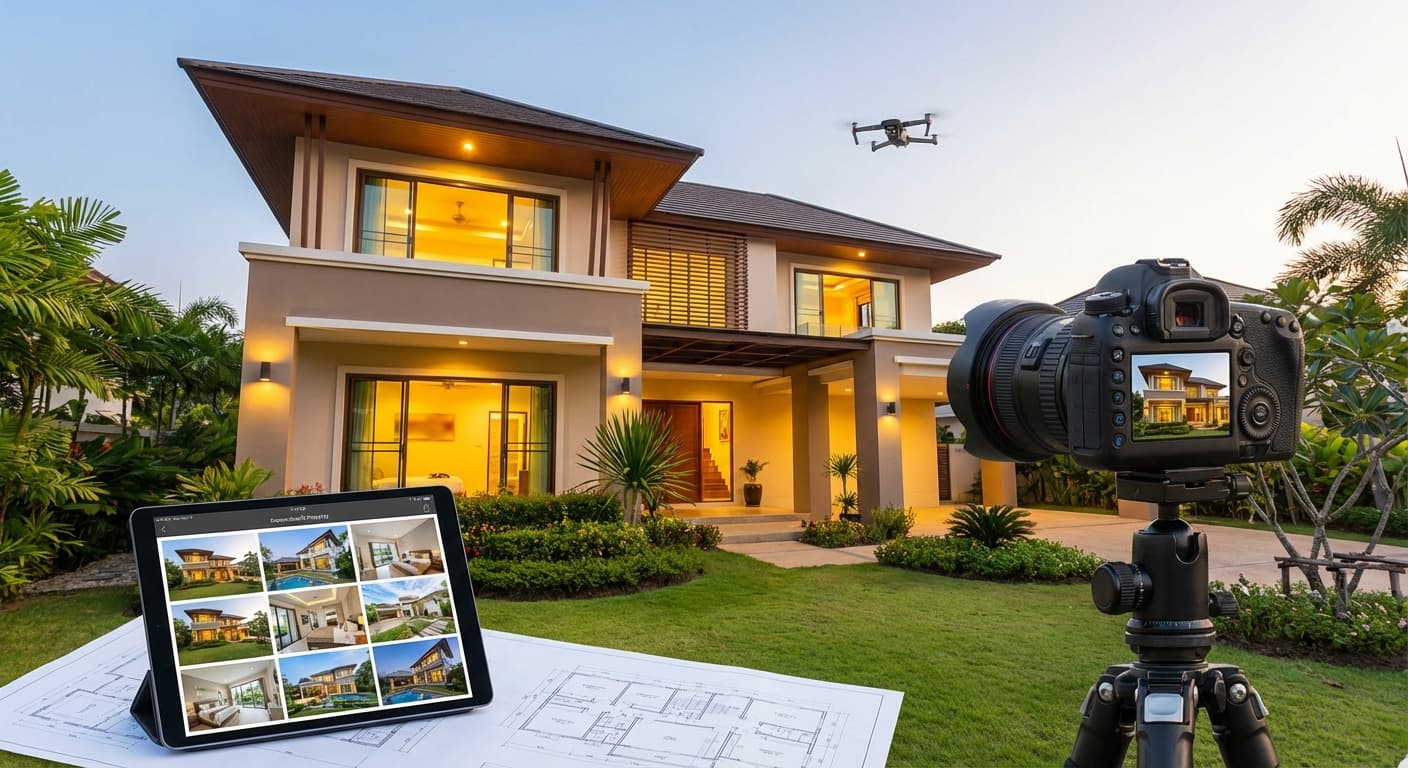
Lighting adalah single most important factor dalam property photography—bahkan lebih penting dari camera quality! Research menunjukkan well-lit photos meningkatkan perceived property value hingga 15-20% dan generate 50% more inquiries. Tapi banyak agent yang think good lighting requires expensive equipment.
Good news? Natural light is free, dan dengan teknik yang tepat, Anda bisa create professional-looking photos tanpa invest ribuan dollar dalam lighting equipment. Di artikel ini, Anda akan belajar cara maximize natural light dan create beautiful property photos dengan budget minimal!
Key Takeaways
Natural light is your best friend Golden hour Open ALL curtains Turn on ALL lights DIY reflectors Avoid harsh midday sun- —dan it's completely free!
- (9-11 AM) menghasilkan best interior lighting
- meningkatkan brightness hingga 300%
- (even during day) untuk balanced lighting
- (Rp 50-200k) bisa dramatically improve lighting
- —overcast days actually better untuk interiors!
- : Dark photos = small, uninviting rooms
- : Wrong lighting = weird color casts (yellow, blue, green)
- : Warm light = inviting, cold light = sterile
- : Good light reveals features, bad light hides them
- Well-lit photos:
- Dark photos:
- Professional lighting:
- : Strong, harsh, creates shadows
- : Soft, diffused, flattering
- : Even, shadowless, great untuk interiors
- : Warm, soft, beautiful
- : Warm yellow (2700K)
- : Cool white/green (4000-5000K)
- : Varies (2700-6500K)
- : Harsh, unflattering (avoid!)
- Windows (cool blue) + indoor lights (warm yellow)
- Creates color casts
- Requires balancing
- ✅ Bright but not harsh
- ✅ Soft, diffused light
- ✅ Warm but not too yellow
- ✅ Even coverage
- ✅ Perfect untuk most rooms
- ✅ Still bright
- ⚠️ More directional (stronger shadows)
- ✅ Works if morning not possible
- ❌ Harsh overhead sun
- ❌ Strong shadows
- ❌ Blown-out windows
- ❌ Difficult to balance
- ⚠️ Lower light levels
- ⚠️ More yellow/orange tones
- ✅ Can work dengan editing
- ✅ Soft, even light
- ✅ No harsh shadows
- ✅ Easy to expose correctly
- ✅ Consistent throughout day
- Increases light by
- Makes rooms feel larger
- Shows outdoor views
- Creates inviting atmosphere
- Dirty windows block of light
- Clean inside & outside
- Huge difference untuk minimal effort
- Screens block of light
- Remove temporarily untuk shoot
- Replace after photos
- : Shows view, bright background
- : Avoids blown-out highlights
- : Creates depth & dimension
- Reflect light (natural reflectors!)
- Brighten entire room
- If painting, choose light colors
- Reflect & multiply light
- Strategic placement helps
- Clean thoroughly (smudges show!)
- Reflects light
- Makes room brighter
- Dark furniture absorbs light
- Removes shadows & dark spots
- Allows light to flow
- Makes room feel larger
- Supplements natural light
- Fills shadows
- Creates warm, inviting glow
- Balances window brightness
- ✅ Ceiling lights
- ✅ Table lamps
- ✅ Floor lamps
- ✅ Under-cabinet lights (kitchen)
- ✅ Accent lights
- ✅ Outdoor lights (if visible)
- Seems counterintuitive, but works!
- Adds warmth
- Balances exposure
- Professional look
- Check ALL bulbs
- Replace any burnt out
- Ensure all working
- Dark fixtures look bad
- Inconsistent lighting
- Unprofessional appearance
- Different bulbs = different colors
- Some warm (yellow), some cool (blue)
- Creates weird color casts
- Replace all bulbs dengan same color temperature
- : 2700-3000K (warm white)
- Consistent, inviting look
- At least match bulbs dalam same room
- Prioritize main living areas
- ❌ Harsh, unflattering light
- ❌ Creates strong shadows
- ❌ Washes out colors
- ❌ Looks amateur
- ✅ Use natural light
- ✅ Turn on room lights
- ✅ Increase camera ISO (if needed)
- ✅ Use tripod (slower shutter OK)
- Bounced flash (advanced technique)
- External flash pointed at ceiling
- Creates soft, diffused light
- Requires external flash unit (Rp 1-3 juta)
- Bounce light into dark areas
- Fill shadows
- Brighten rooms
- Free/cheap!
- Buy at art supply store
- Large white board (1m x 1m)
- Lightweight, portable
- Reflects soft, neutral light
- Cover cardboard dengan foil
- Shiny side out
- Reflects strong light
- More directional
- Hang white sheet opposite window
- Reflects soft light
- Diffuses harsh light
- Use what you have!
- Position opposite window
- Angle towards dark areas
- Bounce light into shadows
- Adjust position untuk best effect
- Brightens dark corners
- Fills shadows
- More even lighting
- Professional look
- Soften harsh direct sunlight
- Create even, flattering light
- Reduce harsh shadows
- Hang over window
- Diffuses harsh sun
- Creates soft, even light
- Easy to install/remove
- Tape over window (temporarily)
- Diffuses light
- Very cheap
- Remove after shoot
- Collapsible diffuser panel
- Portable
- Reusable
- Best quality
- Harsh direct sunlight through windows
- Strong shadows
- Blown-out highlights
- Midday shoots (when unavoidable)
- Dark rooms
- No windows
- Evening shoots
- Basements
- Portable, battery-powered
- Adjustable brightness
- Daylight-balanced (5500K)
- Lightweight
- Replace existing bulbs
- Brighter LED bulbs
- Daylight-balanced
- Leave in property (bonus!)
- Popular untuk video
- Also works untuk photos
- Even, shadowless light
- Good untuk small rooms
- Position at 45° angle
- Point at ceiling (bounce light)
- Or: Direct at dark corners
- Supplement natural light
- Small attachment untuk smartphone
- Diffuses harsh flash
- Creates softer light
- White tissue paper over flash
- Tape lightly
- Diffuses light
- Emergency solution
- Very dark rooms
- No other light source
- Last resort only
- Often largest room
- Multiple light sources
- Mixed lighting (windows + lamps)
- ✅ Shoot during golden hour (9-11 AM)
- ✅ Open all curtains
- ✅ Turn on all lamps
- ✅ Use reflector untuk dark corners
- ✅ Shoot from corner (captures most light)
- ❌ Shooting directly into windows (blown out)
- ❌ Leaving lamps off (dark, uninviting)
- ❌ Harsh midday sun
- Often darker (fewer windows)
- Cabinets create shadows
- Under-cabinet lighting helps
- ✅ Turn on ALL lights (ceiling, under-cabinet, pendant)
- ✅ Open window treatments
- ✅ Use reflector untuk dark lower cabinets
- ✅ Shoot from multiple angles
- ✅ Clean counters (reflect light)
- ❌ Dark, shadowy cabinets
- ❌ Leaving under-cabinet lights off
- ❌ Dirty, dark countertops
- Often darker (privacy curtains)
- Smaller windows
- Cozy vs bright balance
- ✅ Open curtains fully
- ✅ Turn on bedside lamps
- ✅ Use overhead light
- ✅ Reflector untuk dark corners
- ✅ Make bed perfectly (reflects light)
- ❌ Closed curtains (too dark)
- ❌ Unmade bed (shadows, dark)
- ❌ Clutter (creates shadows)
- Often smallest windows
- Tile can create harsh reflections
- Vanity lighting crucial
- ✅ Turn on vanity lights
- ✅ Turn on shower/tub lights
- ✅ Open window/skylight
- ✅ Clean mirror (reflects light)
- ✅ White towels (reflect light)
- ❌ Leaving lights off
- ❌ Dirty mirror (dark spots)
- ❌ Dark towels (absorb light)
- Little/no natural light
- Often darker finishes
- Difficult to photograph
- ✅ Turn on ALL lights
- ✅ Bring portable LED lights
- ✅ Use reflectors extensively
- ✅ Shoot multiple exposures (HDR)
- ✅ Edit aggressively (brighten)
- ❌ Relying on natural light (not enough)
- ❌ Using flash (harsh)
- ❌ Giving up (dark photos kill sales)
- Tap to focus
- Slide exposure up (+1 to +2)
- Makes image brighter
- Available on modern smartphones
- Combines multiple exposures
- Reduces noise
- Brighter, cleaner images
- Balances bright & dark areas
- Essential untuk rooms dengan windows
- Turn ON
- Reduces quality
- Increases noise
- Crop later instead
- Increase untuk more light sensitivity
- : 400-1600 (higher = more noise)
- : 400-800 untuk most rooms
- Wider aperture (f/2.8-f/5.6) = more light
- But: Narrower depth of field
- : f/5.6-f/8 untuk rooms
- Slower shutter = more light
- : Camera shake if too slow
- : Use tripod!
- : 1/60 to 1 second (dengan tripod)
- Allows slower shutter (more light)
- Eliminates camera shake
- Consistent framing
- : Rp 200-500k (worth it!)
- Windows (cool blue light, 5500K)
- Indoor lights (warm yellow, 2700K)
- Camera confused (weird colors)
- Blue color cast near windows
- Yellow color cast near lamps
- Inconsistent, unprofessional look
- RAW files allow white balance adjustment
- Fix in editing (Lightroom, Photoshop)
- Most flexible option
- : Camera that shoots RAW
- Replace indoor bulbs dengan daylight-balanced (5500K)
- Or: Use warm-balanced bulbs everywhere (2700K)
- Consistent color throughout
- : Rp 50-200k (bulbs)
- : More natural light, less indoor light needed
- : All indoor lights, close curtains
- Avoids mixing
- More consistent
- Adjust white balance in editing
- Selective color correction
- Time-consuming but effective
- : Editing skills
- Increase if too dark (+0.3 to +1.0)
- Goal: Bright & inviting
- Don't overdo (blown out)
- Lift shadows (+20 to +50)
- Reveals detail in dark areas
- Makes rooms look larger
- Reduce highlights (-20 to -50)
- Recovers blown-out windows
- Balances exposure
- Fix color casts
- Aim untuk neutral white
- Warm is OK (inviting), but not too yellow
- Slight increase (+5 to +15)
- Adds definition
- Don't overdo (harsh)
- Shoot 3 exposures: dark, normal, bright
- Merge in Lightroom/Photoshop
- Balances bright windows + dark room
- Professional results
- Brighten specific areas (dark corners)
- Darken specific areas (blown windows)
- Targeted adjustments
- Natural-looking results
- Removes atmospheric haze
- Adds clarity
- Makes photos "pop"
- Use sparingly (+5 to +15)
- White foam board reflector (Rp 100k)
- LED bulbs untuk existing fixtures (Rp 150k)
- Smartphone tripod (Rp 100k)
- White sheer curtains (Rp 150k)
- Dramatically better lighting
- Professional-looking photos
- Reusable untuk all shoots
- Portable LED panel light (Rp 400k)
- Collapsible diffuser (Rp 300k)
- Full-size tripod (Rp 300k)
- Handle any lighting situation
- Consistent professional results
- Faster workflow
- External flash + diffuser (Rp 2 juta)
- Multiple LED panels (Rp 1.5 juta)
- Light stands (Rp 500k)
- Studio-quality lighting
- Complete control
- Luxury property ready
- ✅ Schedule next shoot untuk 9-11 AM
- ✅ Make DIY reflector (white foam board, Rp 100k)
- ✅ Practice opening all curtains & turning on all lights
- ✅ Compare results (before vs after)
- ✅ Invest in starter lighting kit (Rp 500k)
- ✅ Replace bulbs dengan consistent color temperature
- ✅ Master natural light photography
- ✅ Learn basic editing (exposure, shadows, highlights)
- ✅ Always shoot during golden hour (9-11 AM)
- ✅ Use reflectors untuk every shoot
- ✅ Continuously improve lighting skills
- ✅ Upgrade equipment as budget allows
- : Use it wisely!
- : 9-11 AM is golden
- : Curtains, blinds, windows
- : Even during day
- : Reflectors cost Rp 50-100k
- : But start dengan good lighting
- : Your 100th shoot will be way better than your 1st
Understanding Light in Photography
Why Lighting Matters
Impact on Photos:
Brightness Color Mood DetailsImpact on Sales:
50% more inquiries 40% fewer showings 15-20% higher perceived valueTypes of Light
Natural Light (Free!):
Direct sunlight Indirect sunlight Overcast Golden hourArtificial Light:
Tungsten/Incandescent Fluorescent LED FlashMixed Lighting (Challenge!):
Maximizing Natural Light (FREE!)
Best Time of Day
9-11 AM (BEST!):
2-4 PM (Good):
Midday 12-2 PM (Avoid!):
Early Morning/Late Afternoon (OK):
Overcast Days (Surprisingly Good!):
💡 Pro Tip: Schedule shoots untuk 9-11 AM whenever possible. This single change will dramatically improve your photos!
Window Management
Open ALL Curtains & Blinds:
200-300%Clean Windows:
20-30%Remove Window Screens (If Safe):
10-15%Strategic Window Use:
Shoot towards windows Shoot away from windows Side lightingRoom Preparation
White/Light Walls:
Mirrors:
Light-Colored Furniture:
Declutter:
💡 Baca Juga: 10 Tips Foto Interior Properti yang Menarik
Artificial Lighting Strategies
Turn On ALL Lights
Why:
What to Turn On:
Even During Day:
Replace Burnt-Out Bulbs
Before Shoot:
Why:
Match Color Temperature
Problem:
Solution:
RecommendationBudget Option:
Avoid Direct Flash
Why Flash is Bad:
What to Do Instead:
Exception:
DIY Lighting Solutions (Budget-Friendly!)
1. DIY Reflectors (Rp 50-200k)
What They Do:
Materials:
Option 1: White Foam Board (Rp 50-100k)
Option 2: Aluminum Foil + Cardboard (Rp 20k)
Option 3: White Bedsheet (Free!)
How to Use:
Impact:
50-100%2. Diffusers (Rp 100-300k)
What They Do:
DIY Options:
White Sheer Curtains (Rp 100-200k):
Parchment Paper (Rp 50k):
Professional Diffuser (Rp 300-800k):
When to Use:
3. Budget LED Lights (Rp 200-500k)
When Natural Light Isn't Enough:
Recommended:
LED Panel Light (Rp 200-400k):
LED Bulbs in Existing Fixtures (Rp 50-150k):
Ring Light (Rp 300-500k):
How to Use:
4. Smartphone Flash Diffuser (Rp 50-100k)
What It Is:
DIY Version (Free!):
When to Use:
Room-Specific Lighting Tips
Living Room
Challenges:
Solutions:
Avoid:
Kitchen
Challenges:
Solutions:
Avoid:
Bedroom
Challenges:
Solutions:
Avoid:
Bathroom
Challenges:
Solutions:
Avoid:
Basement/Dark Rooms
Challenges:
Solutions:
Avoid:
Camera Settings for Low Light
Smartphone Settings
Increase Exposure:
Use Night Mode:
HDR Mode:
Avoid Digital Zoom:
DSLR/Mirrorless Settings
ISO:
Range Sweet spotAperture:
RecommendationShutter Speed:
Problem Solution RangeTripod Benefits:
InvestmentDealing with Mixed Lighting
The Problem
Scenario:
Result:
Solutions
Option 1: Shoot in RAW
RequirementOption 2: Match Color Temperatures
CostOption 3: Shoot at Different Times
Morning EveningOption 4: Edit in Post
Requires💡 Recommendation: Shoot in RAW + edit white balance later (most flexible!)
Editing for Better Lighting
Basic Adjustments
Exposure/Brightness:
Shadows:
Highlights:
White Balance:
Contrast:
Advanced Techniques
HDR Merging:
Selective Editing:
Dehaze:
💡 Baca Juga: Editing Foto Properti: Apps dan Tools Terbaik untuk Agent
Common Lighting Mistakes
Mistake #1: Not Opening Curtains
Problem: Dark, uninviting rooms
Solution: Open ALL curtains & blinds
Mistake #2: Shooting at Wrong Time
Problem: Harsh midday sun atau too dark
Solution: Shoot 9-11 AM (golden hour)
Mistake #3: Not Turning On Lights
Problem: Dark, cold-looking rooms
Solution: Turn on ALL lights (even during day)
Mistake #4: Using Direct Flash
Problem: Harsh, unflattering, amateur look
Solution: Use natural light + room lights instead
Mistake #5: Ignoring Color Temperature
Problem: Yellow, blue, atau green color casts
Solution: Match bulb temperatures, shoot RAW, fix in editing
Mistake #6: Dirty Windows
Problem: Blocked light, hazy look
Solution: Clean windows inside & out before shoot
Mistake #7: Not Using Reflectors
Problem: Dark corners, uneven lighting
Solution: DIY reflector (Rp 50k) fills shadows
Budget Lighting Kit
Starter Kit (Rp 500k)
Essential:
Total: Rp 500k
Impact:
Intermediate Kit (Rp 1.5 juta)
Add:
Total: Rp 1.5 juta
Impact:
Advanced Kit (Rp 5 juta)
Add:
Total: Rp 5 juta
Impact:
💡 Recommendation: Start dengan Starter Kit (Rp 500k). Upgrade as you grow!
Kesimpulan
Good lighting doesn't require expensive equipment—it requires understanding light dan using what's available (especially free natural light!). Dengan proper timing (9-11 AM), window management (open everything!), dan simple DIY solutions (reflectors!), Anda bisa create professional-quality property photos dengan minimal investment.
Action Plan:
This Week:
This Month:
Ongoing:
Remember:
Natural light is free Timing matters Open everything Turn on all lights DIY works Editing helps Practice makes perfectStart implementing these lighting techniques today, dan watch your property photos transform! 💡📸
Baca Juga:
10 Tips Foto Interior Properti yang Menarik Foto Eksterior Properti: Angle dan Waktu Terbaik Editing Foto Properti: Apps dan Tools Terbaik untuk Agent